
Building EV Buddy
In the past couple of years I’ve become interested in the cloud. I’ve spent a good chunk of my career working in mobile development, and if theres one trend I don’t think is going away soon is apps powered by a platform. As any good engineer would do, I was keen to learn more.
To start, I put myself through AWS certifications. I received AWS Cloud Practitioner Certification last year (passed first time!) and earlier this year passed my Associate Solutions Architect Certification (passed on the 2nd attempt after a washout of a 1st attempt).
Official pieces of paper saying you can do things get a bad rep, I’ve met a few people who consider them worthless. I can understand this way of thinking as alot of these people have years of hard earned experience.
I can also understand why employers and engineers like them. To me, they’re an extra signal to employers and organisations that you have experience in the areas you claim to in your CV and done the hard work to prove it.
So certifications are nice, but I also wanted a project to help showcase that knowledge. As part of my learning, I decided to build a full stack application. I’m happy to say v0.0.1 is ready and live, and it’s called EV Buddy.
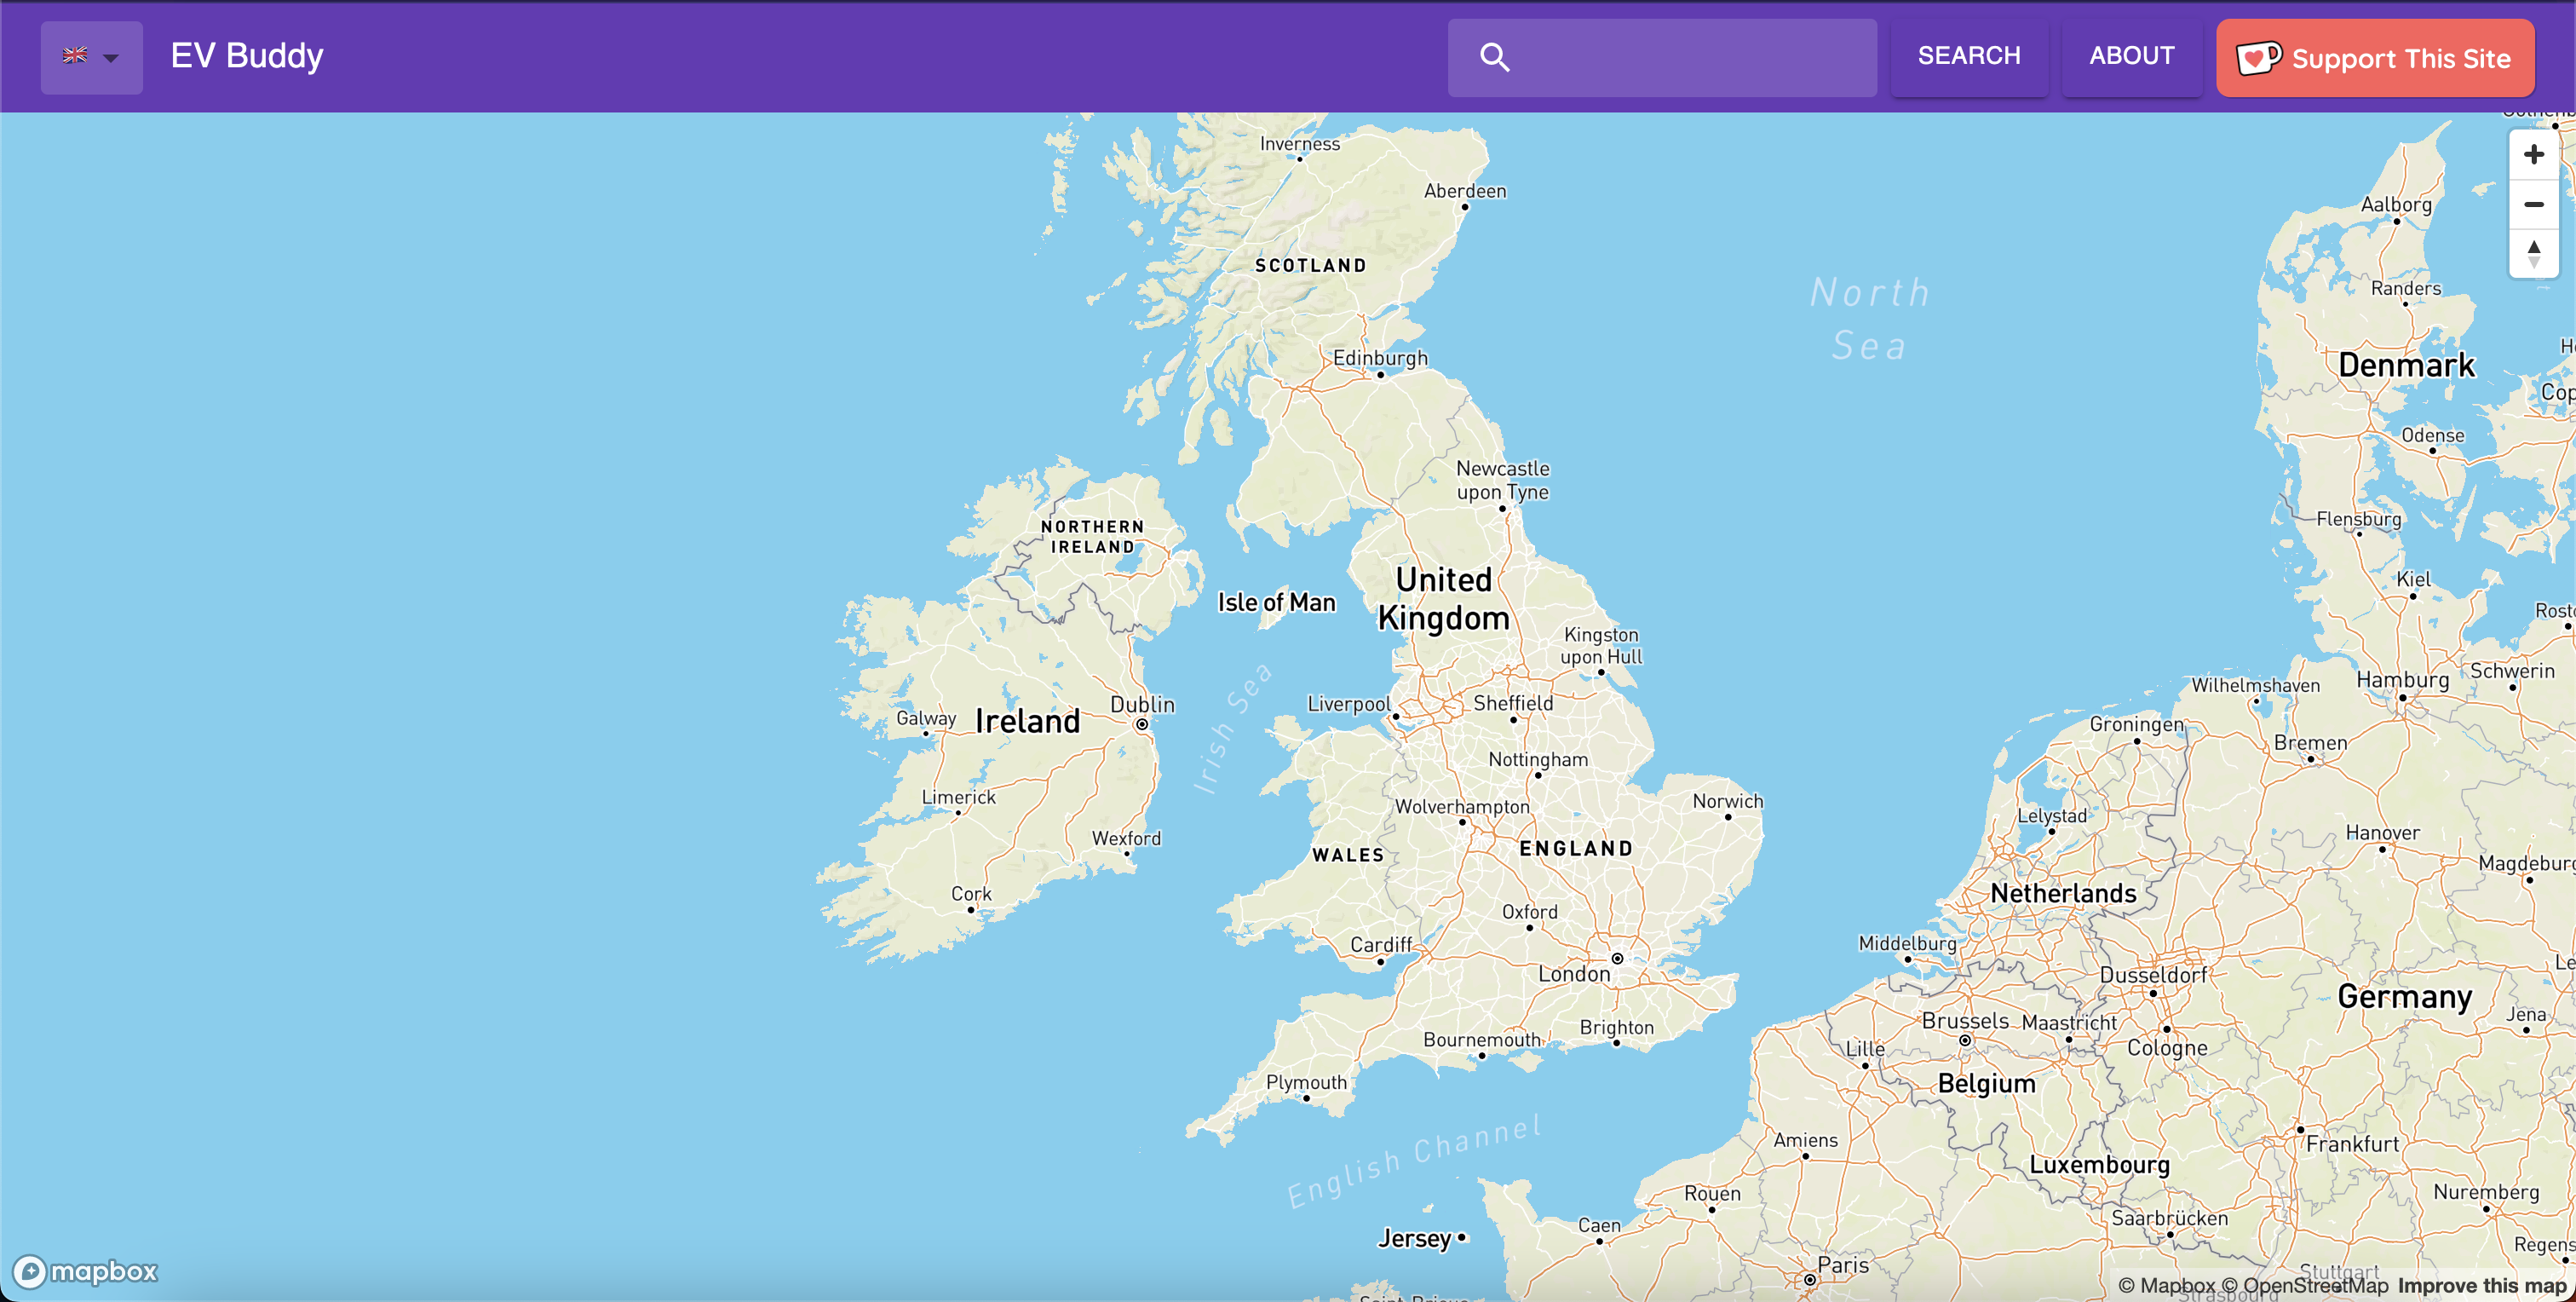
EV Buddy
EV Buddy is an interactive map showing publicly available electric vehicle charging points. You search for charging points using a postcode, and the map displays public charging points nearby. Users can then click on the charging point to see more infomation. For v0.0.1, EV Buddy is limited to searches in the UK.
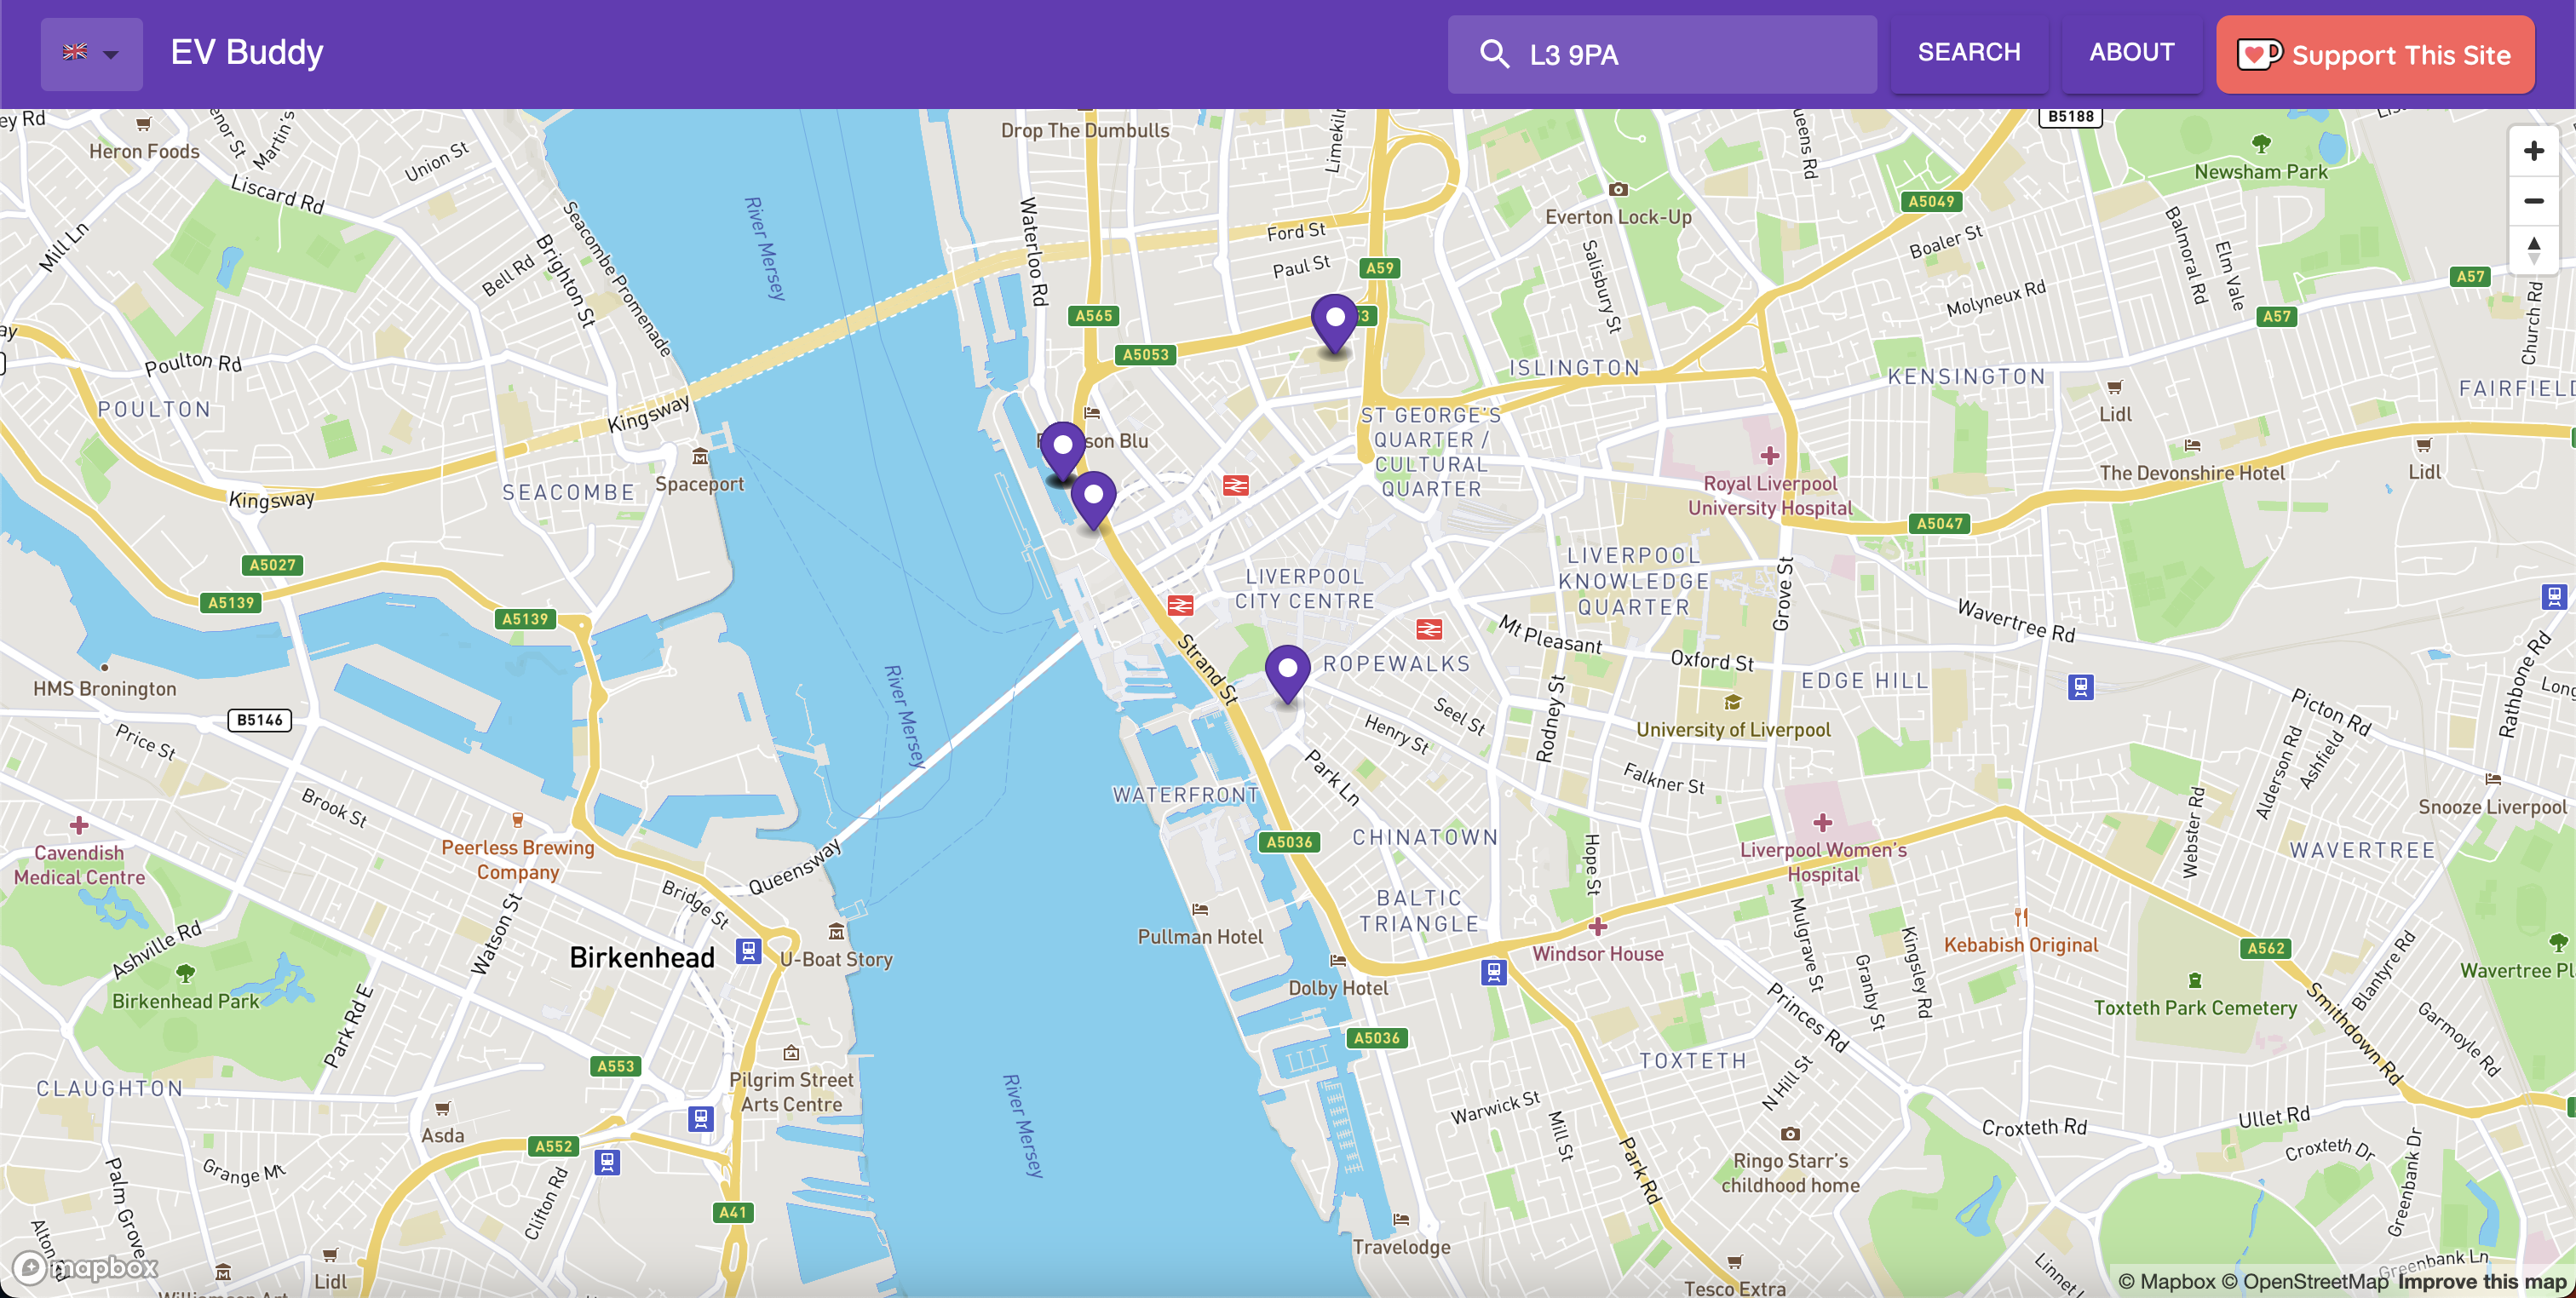
Each charging point provides infomation such as what charging connectors the point supports, who controls the charger, whether payment is required for usage, and the address of where it is located. Useful things to know if you’re planning a journey in your EV.
EV Buddy links directly to other mapping platforms. If you’d like to use Google Maps or Apple Maps to get directions to that charger, it’s only a click of a button away.
The data for the UK is requested from the National Charging Registry, a database of public charging points available across the UK. It’s free to access and regularly updated, meaning the map also benefits from these updates.
Let’s take a look at the stack.
The Technical Stack
EV Buddy uses the following technologies:
Frontend
- ReactJS (Frontend Development)
- Mapbox GL JS (Mapping Provider)
- MUI (Material Design UI Library for React)
Backend
- Node.js / Express (Backend Development)
- Serverless Framework (Packages code into deployable AWS Lambda functions)
Cloud Infrastructure
- AWS S3 (Object Storage)
- AWS Lambda (Serverless computing)
- AWS Cloudfront (Content Distribution Network for Website)
- AWS Route 53 (Domain Registration / DNS Record Management)
- AWS Certificate Manager (Website / Endpoint Encryption)
Below is the cloud architectural diagram of how EV Buddy is put together.
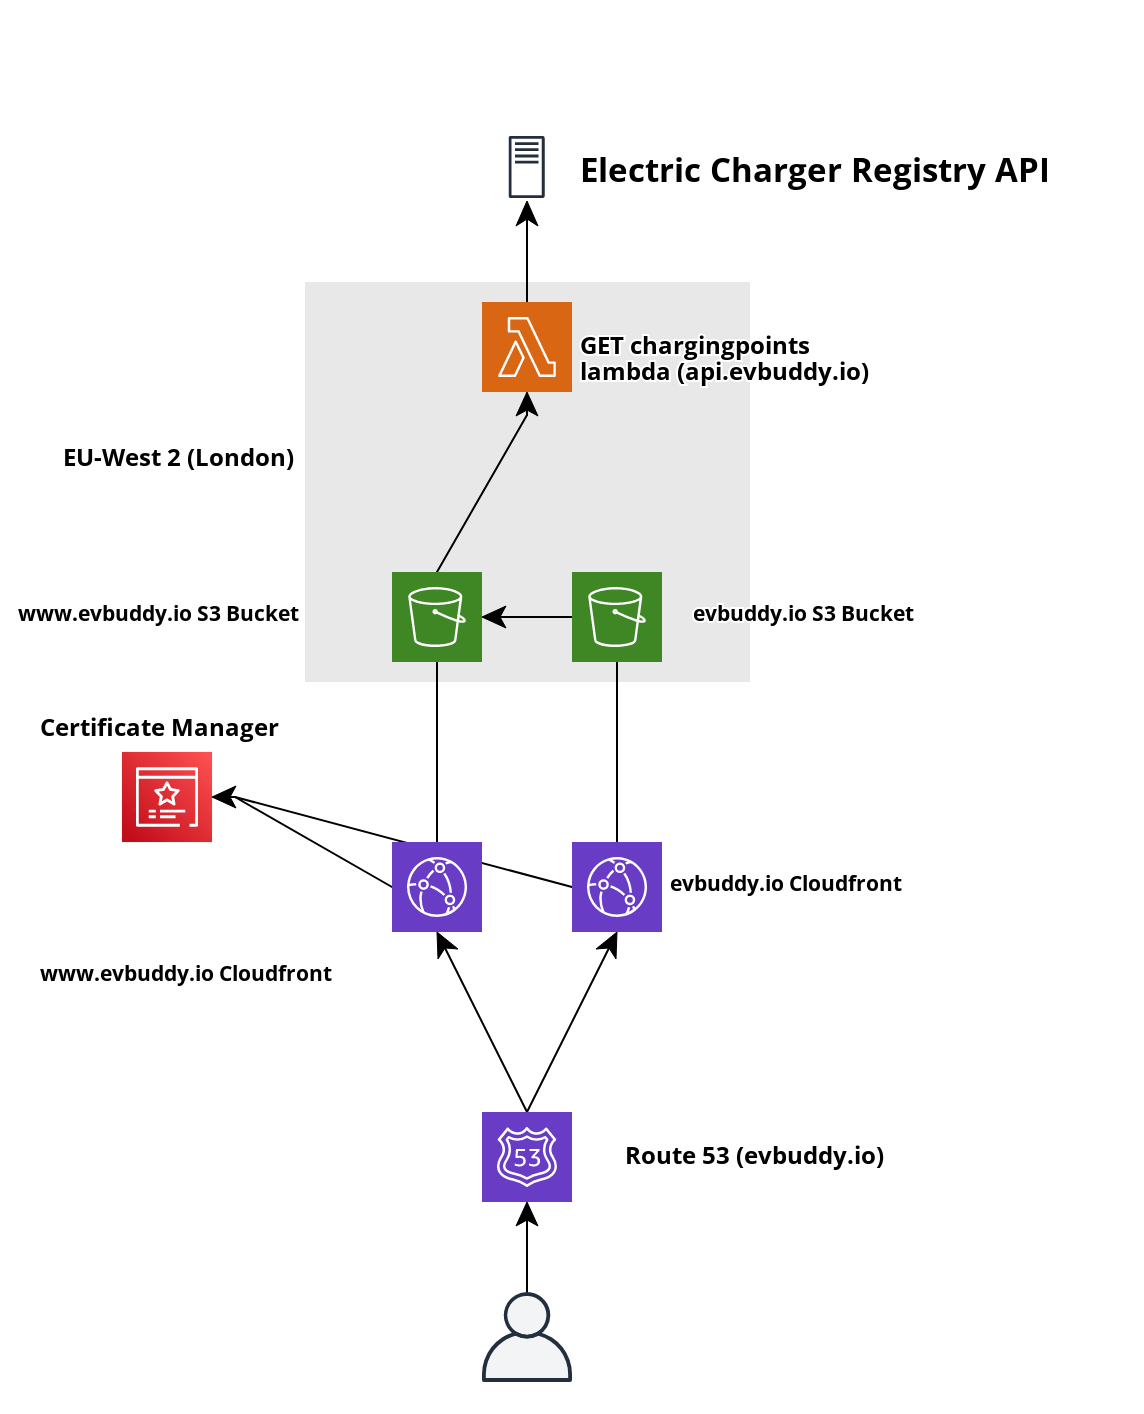
Although there was alot of trial and error involved to get it right, the architecture diagram is not very complicated. Below, I’ve wrote up the more interesting challenges faced, the decisions made for the architecture, and the outcomes from that.
Choosing a Web Framework
The first decision was the choice of tools for frontend development. ReactJS felt a natural choice as alot of the concepts behind Declarative UI frameworks on mobile find their roots within React. It was also a familar tool, as I’d completed a FreeCodeCamp backend course that used React as it’s Frontend framework of choice.
I went with using Create React App to setup the initial build. There was little thought here except I wanted to get started quickly and Create React App allows you to do just that.
Now I have more knowledge of the ecosystem I may of considered using Gatsby or Next.js. My understanding is these frameworks provide more features like mobile support and automatic optimisations than the barebones setup you get with Create React App.
Deciding on a Mapping Provider
The next step was to choose a mapping provider. I initially tried Apple Maps Web API, unfortunately they only provide a Javascript based API. Something I wanted to avoid writing too much of within a React App.
There are attempts by people to wrap Apple Maps within React Components. For one reason or another I found these attempts to be lacking for what I needed.
My next attempt was with Google Maps. This was a similar situation to Apple Maps, very little ReactJS support and a few brave developers trying their hand themselves to wrap Google Maps.
After getting setup with an API key and trying out some of these frameworks I found myself running into issues again. The map wouldn’t load, there were graphical glitches. Enough trouble for me to decide persuing this further wasn’t worthwhile and decide to move on.
The third attempt was to use Mapbox GL. This time I was making progress, I quickly had a map rendering and could move it about with little trouble. The API is again Javascript based but the integration and support from Mapbox to use their API with React made it easy to work with.
There are rough edges to the API that make Mapbox feel lacking. For instance, there’s no click method available for an individual marker. There’s an issue raised dating from 2019 about it, with people suggesting various workarounds.
The workaround I picked worked, but seems like a poor developer experience to have to rely on a workaround to detect a marker click.
Despite these faults, I’m finding my use of Mapbox GL to be a good decision.
Node.js, Serverless and AWS Lambda
My next decision was to decide on the tools to use for backend development. My FreeCodeCamp course had used Node.js for the backend, so I decided to rely on that experience to code a small server. The purpose of it to calling out to the National Charging Registry API and return the response to the website.
This was an easy exercise. The difficult part came when deploying the server to AWS and balancing costs. I didn’t want the hassle of having to manage a server, so initially went with AWS Elastic Beanstalk.
Elastic Beanstalk is a service taking the pain out of managing an environment and does all the hard work for you. You give it the code, and it gets to work deploying everything you need for your environment. It’s an impressive product.
The downside of Elastic Beanstalk is it’s expensive, even for tiny workloads and deploying iterations. I barely did anything and managed to rack up an AWS bill of about ~$80 in 1 month. No where sustainable in my eyes for a small project.
I decided to see if Lambda functions were cheaper on AWS and could still work with my Node.js server. To my surprise AWS offers a free tier for Lambda functions, allowing 1 Million free requests per month.

This was progress, however I had built a server, not a Lambda function. A quick internet search solved this problem though, as I found a framework called Serverless. Serverless provides a wrapping for Node.js, turning it into a deployable Lambda function.
Serverless also provides tooling to automate deployment of the function via config files, including setting a custom domain and securing the domain with a SSL certificate.
With this I found a solution that is essentially free to run and gives the flexibility to deploy the lambda separately to the website. Deploying via Elastic Beanstalk on the otherhand, meant the website and server were tightly coupled.
Route 53
Once the website and Lambda were in a good state I needed to decide upon a domain name and what DNS registar to use. Fortunately AWS provide their own, called Route 53. Route 53 provides most of the features you would expect from a DNS Registar, ranging from Domain purchase to Adding Records for your domain.
Route 53 also provide additional features like DNS routing policies. These route traffic depending on conditions such geographical location, weighted distribution between destinations and even latency to ensure the request provides the quickest response.
Route 53 also uses the concept of a Hosted Zone, a place where DNS records are stored for your domain. Useful if you have multiple domains.
One of the things I found with hosted zones is the NS records change if you delete and recreate a hosted zone. This can be a problem if you rely on the NS records for operations like DNS validation for an SSL certificate. The related NS records never change for a domain name, but do for a hosted zone.
I figured this out the hard way and only realised the issue after about 6-8 hours of investigation. A mistake I’ll aim not to make again!
Once my hosted zone was setup with my domain, I was now ready to use it for my application.
AWS Certificate Manager
I wanted to make sure the website and Lambda function were accessible using HTTPS. To do that I needed a certificate, and to get one I had to use a service called AWS Certificate Manager.
AWS Certificate Manager provides certificates for web domains, including subdomains. Before AWS issues the certificate it requires you to verify yourself as the owner of the domain.
This is easy to do if you can use DNS Validation, a way of allowing AWS to use DNS to verify you as the domain owner using NS records. These records are already setup if you use Route 53, or you can add them to your own DNS Registry.
As mentioned in the previous section, I had deleted and recreated the hosted zone created for evbuddy.io, which meant the NS records AWS were looking for didn’t match.
Once I fixed this however the validation happened in a couple of minutes and I had a certificate ready to use.
Setting up the stack to use the certificate was a few clicks in the AWS console, or Click-Ops if you’re familar with the term. 😉
S3 & Cloudfront
With a domain and certifcate ready to use, my next step was to store my website on AWS and provide access via my domain. The simplest way to do this was to create an S3 bucket and use it as the origin for a Cloudfront distribution.
S3 is an object based storage product. It can store files in various formats and provides configuration on where these files can be accessed and how long it takes to access them.
The configuration of S3 determines the pricing paid. By default new users of AWS get 12 months free of standard S3 storage with 20,000 GET requests and 2,000 PUT requests.
Outside of that AWS gives generous transfer rates in and out of S3. Transfer rates in are free of charge and transfer rates out are free for the first 100GB per month.
For EV Buddy, I created two S3 buckets. The first one contains the files for the website, whilst the second bucket points to the 1st bucket. The reason for this is both buckets are intended to be used as content points for AWS Cloudfront. Each responds to different URL requests a user may make.
The idea is it makes rerouting requests the user makes to the same website in varying ways simpler. A user querying evbuddy.io can be treated differently to www.evbuddy.io for instance.
With the buckets setup, it was time to turn attention to provide access to the website stored within S3. This is done is via AWS Cloudfront.
Cloudfront is AWS’s content distribution network product. It provides a way for developers to distribute their applications, APIs and content across the globe with low latency, using the infrastructure built by AWS. It’s designed to be highly available, secure and scalable for your needs.
Configuring cloudfront is simple. You tell it where to fetch the content it needs to deal with, let it know relevant infomation like the domain name to respond, what certificate to use for HTTPS, what the caching policy is and you’re done!
Similar to the S3 bucket setup, EV Buddy uses two Cloudfront distributions. Each one handling a different domain request. Both distributions eventually route through to the same S3 Bucket.
One snag I noticed is Cloudfront’s aggressive approach to Caching. If I push a change to the website, it wouldn’t reflect instantly. This isn’t neccessarily a bad thing, as Cloudfront is doing what it’s supposed to. It just means I had to be mindful to immediately invalidate the cache once a change has been pushed.
To solve this, I set object metadata on the files stored in S3. This metadata allowed me to set a Cache-Control value for each file, Cloudfront respects this value by checking it before delivering content.
If the value is older than what Cloudfront expects, Cloudfront updates the content from S3 and passes that through to the requester. Magic!
Costs
2023 has been a hard year for most companies and cost cutting is high on the agenda. I thought it was good to keep this in mind and see how well I can optimise costs. Here is a brief look into the costs:
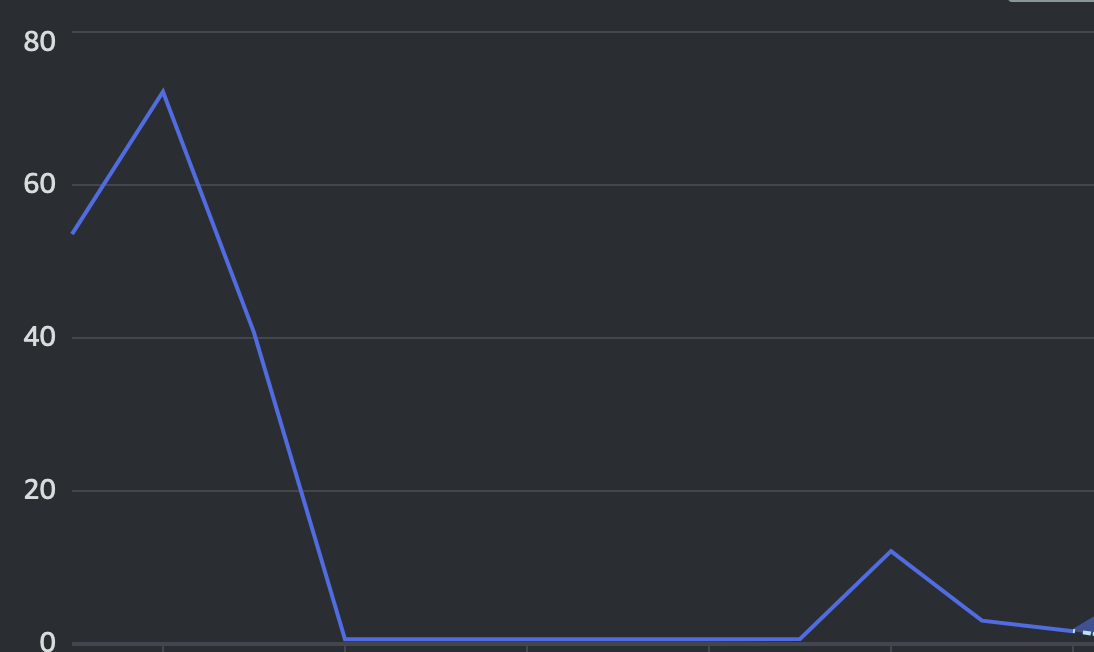
The peak at the left of the graph shows the costs of experimenting with Elastic Beanstalk. These were raising into nearly $80 per month territory, which as mentioned earlier was way beyond my budget.
With the restructuring to use AWS Lambda and relying on free tier pricing for AWS Lambda, S3, and AWS Cloudfront I managed to slash these costs to $1.66 per month as of writing. I expect an element of variance in these costs depending on traffic, but I’m putting a comfortable estimate it won’t raise to more than $5 per month.
One outlier cost not shown is $71 for the evbuddy.io domain name. I expect this to be an annual cost for as long as the website is available. .io domain names aren’t cheap, but they do add some unique flair to a website URL. :)
In total that translates to a cost of $90.92 per year to run evbuddy.io. The worse case scenario in my mind if costs unexpectedly rise would be $130.00 per year.
Not bad for a website hosted within S3, distributed across the globe and communicating with an external API.
Improvements
Below is a list of improvements I would like to make to EV Buddy in the future.
More countries: EV Buddy so far only supports the UK. I’d like to add support for more countries.
Better Mobile Support: The website is usable on mobile, but has usability problems. The map can get stuck when closing the detail page and the toolbar is minimal.
Improved Connector Detail Page: I’d like to clean up the connector detail page. It is basic and unless you’re a EV enthusiast may not be very helpful.
Filtering: I’d like to include filters to the map for users to find chargers based on their preferences. Filters could include charging output, charging networks, or connector types.
Move to TypeScript: The frontend is written entirely in Javascript, but I would like to migrate it to Typescript for the type safety it provides.
Closing Thoughts
Building this project has helped to cement alot of my learning from my AWS certifications. I have enough knowledge to feel confident I can build and help scale a platform whilst keeping costs down.
It’s also helped improve my knowledge of Frontend development, particularly in React. I’d encourage anyone wanting to development their skills in cloud development to come up with their own project and get building. I’m incredibly proud of EV Buddy and will continue to tinker with it as I please.
You can try out EV Buddy at https://evbuddy.io/