
Jetpack Compose for Maps
This post is based off a talk given at Google I/O Extended for Google Developers Group London in July 2023. The slides for the talk are available here
It’s hard to imagine Jetpack Compose 1.0 was released in July 2021. Fast forward two years and with 24% of the top 1000 apps on Google Play adopting Compose it’s easy to understand why.
Amongst all the excitement, one corner of Modern Android Development I feel recieves little attention is Google Maps. It’s been a while since I used the SDK, so was pleasantly surprised to see Google Maps was catching up with the times and released their own Compose library.
This will be welcome news to companies & engineers working in the mapping space. Mobile mapping is a $35.5B industry, with predictions of it raising to $87.7B by 2028. An Compound Annual Growth Rate (CAGR) of 19.83%. Source
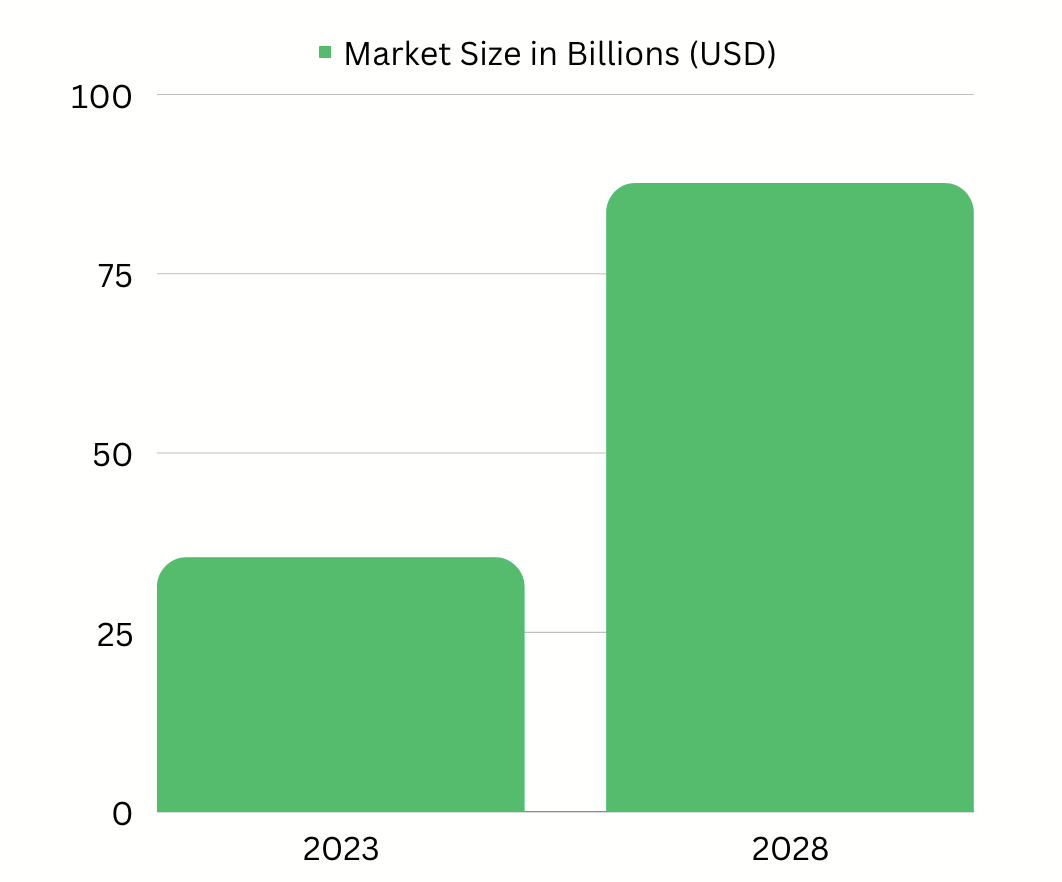
Why is this important? A bigger market means more opportunities for companies to derive revenue from applications of mobile mapping. These range from the usual use cases, food, grocery delivery and ride hailing services. If you dig deep however, there are applications that aren’t immediately obvious. Below are the examples I could find after a brief search.
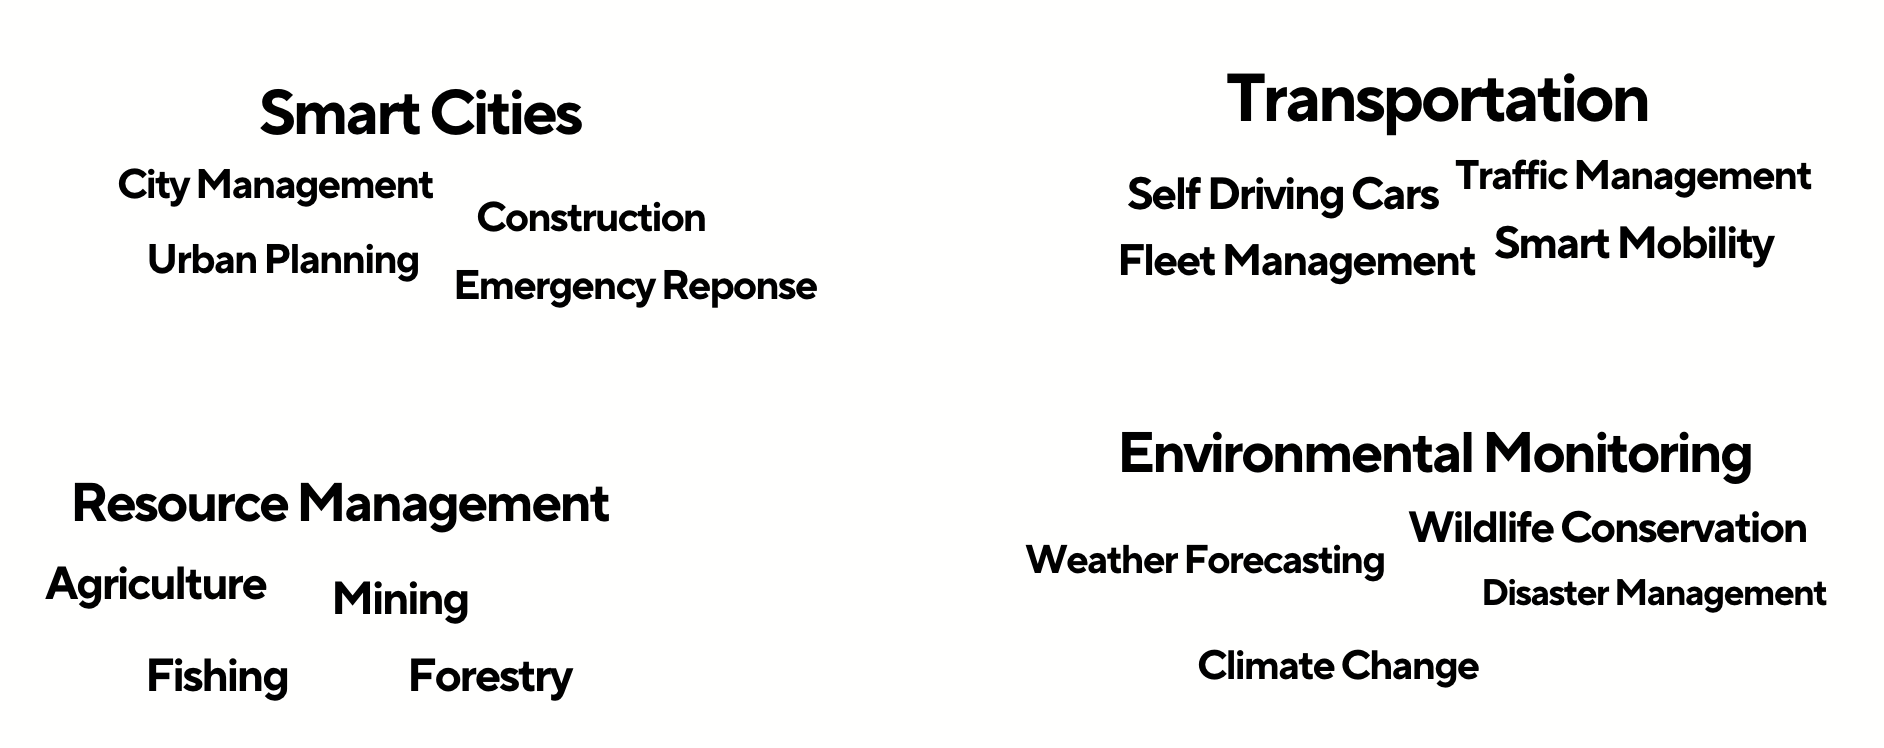
Mobile maps are great for Smart Cities, helping to manage the heartbeat of a city and visualising data in a way to better understand and react to its challenges. Useful for city planners, emergency response organisations or everyday residents.
Resource management also benefits from mapping solutions. Ranging from agriculture to fishing, mining to forestry, maps provide those in this line of work a perspective to make the right decisions to harvest materials in a sustainable way.
Transportation relies heavily on mapping technology. Not just consumer apps like Google Maps or Uber, but business level functions like understanding what a businesses fleet of vehicles are located. Transportation agencies also use maps to manage traffic and help make decisions on where to direct traffic to ease the flow.
Finally, with climate change and the weather being increasingly unpredictable, maps allows meteological agencies, emergency response units, and wildlife conservationists to understand how our world is changing and what we can do to take positive steps to reduce this.
Sources: Mordor Intelligence, GMInsights, Allied Market Research, EMR Research, Google Earth Outreach, Research & Markets
With the world providing more and more data, it’s a good time to learn how to put that data on a map. Let’s do that and get back to the code.
Using Google Maps for Compose
Google Maps for Compose relies on the following dependencies:
dependencies {
  implementation "com.google.maps.android:maps-compose:2.11.4"
  implementation "com.google.android.gms:play-services-maps:18.1.0"

  // Optional Util Library
  implementation "com.google.maps.android:maps-compose-utils:2.11.4"
  implementation 'com.google.maps.android:maps-compose-widgets:2.11.4'

  // Optional Accompanist permissions to request permissions in compose
  implementation "com.google.accompanist:accompanist-permissions:0.31.5-beta"
}
Google Maps for Compose is built on top of the Google Maps SDK, so you need to import the Compose library and the maps SDK. You won’t need to use most objects in the Google Maps SDK, as the compose library wraps most of these in Composables.
The utils and widgets libraries are an optional dependency. The utils library provides the ability to cluster markers on the maps, whilst widgets provides additional UI components. You’ll see these in use later.
For this post, I’ve included the request permissions library from Accompanist to demonstrate how to request location permissions, an often used permission with maps. Accompanist is an experimental library for Google to try out and gather feedback for features not yet part of Jetpack Compose.
Finally, you need to go to the Google Developer Console, sign up for a Google Maps SDK API key, and add it to your project. There’s a guide on the Google Maps Developer Docs on how to do this.
Security Tip: In the Google Developer Console lock down your API key so it only works with your application. This is avoids any unauthorised use.
Showing a Map
Showing a map is as simple as below:
 setContent {
    val hydePark = LatLng(51.508610, -0.163611)
    val cameraPositionState = rememberCameraPositionState {
        position = CameraPosition.fromLatLngZoom(hydePark, 10f)
    }

    GoogleMap(
        modifier = Modifier.fillMaxSize(),
        cameraPositionState = cameraPositionState) {
            Marker(
                state = MarkerState(position = hydePark),
                title = "Hyde Park",
                snippet = "Marker in Hyde Park"
            )
        }
 }
Create a LatLng object with the position of an area, and use it in conjunction with rememberCameraPositionState to set the initial position of the camera. This method remembers the position of the map as you move about using your hands or programmatically. Without this method Compose would recalulate the map back to its initial position on every state change.
Next, create a GoogleMap compose and pass in a modifier of your choice and the camera state. GoogleMap also provides a Slot API to pass in additional composables, these composables are what you want to draw on the map.
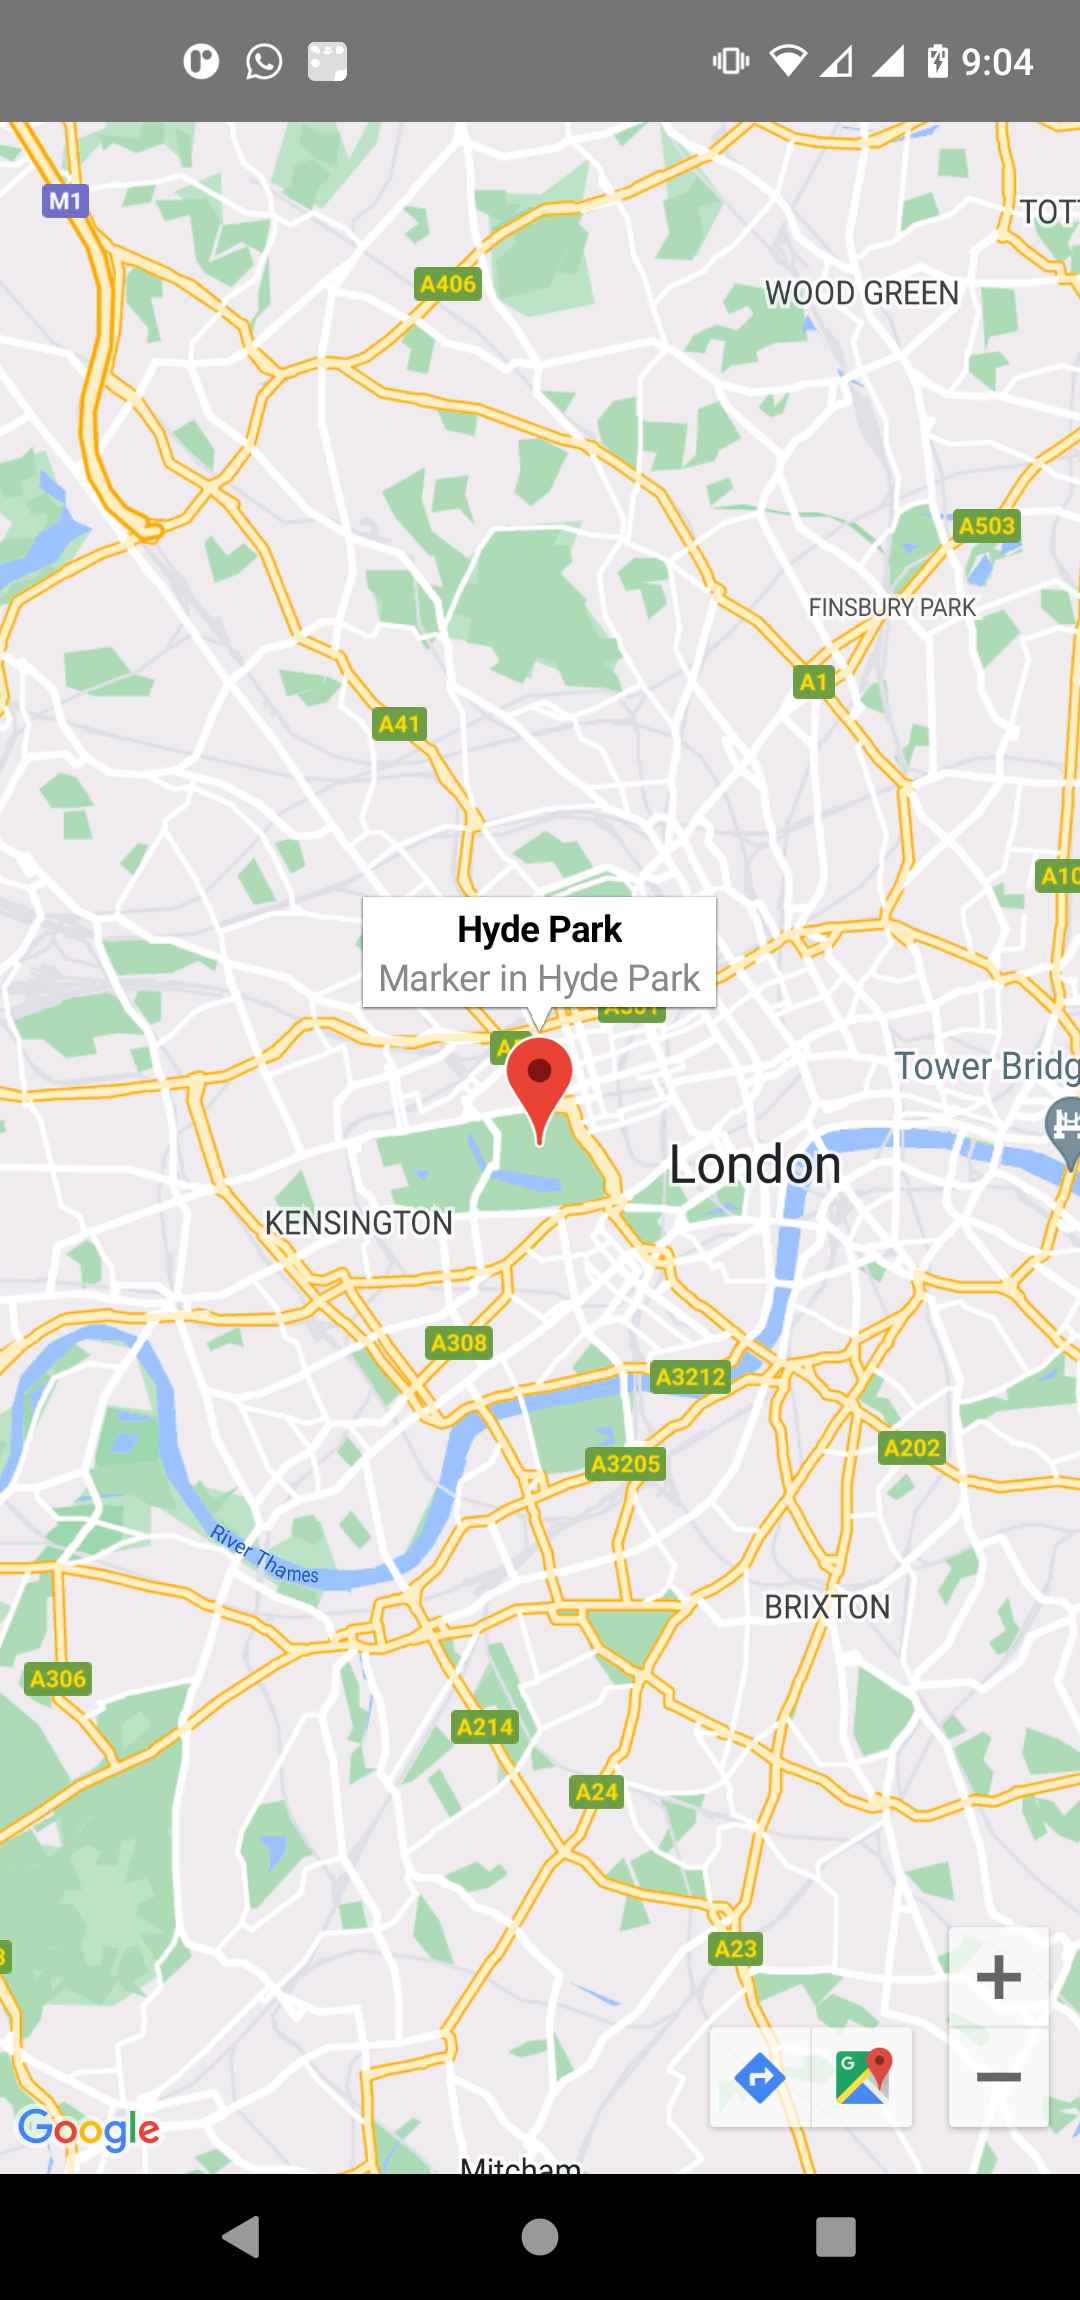
Add a Marker composable, then add a MarkerState containing the position of the marker inside. Finally, add a title and description of the marker.
Running this gives a nice aerial view of West London with a marker in Hyde Park.
Customising the Marker Window
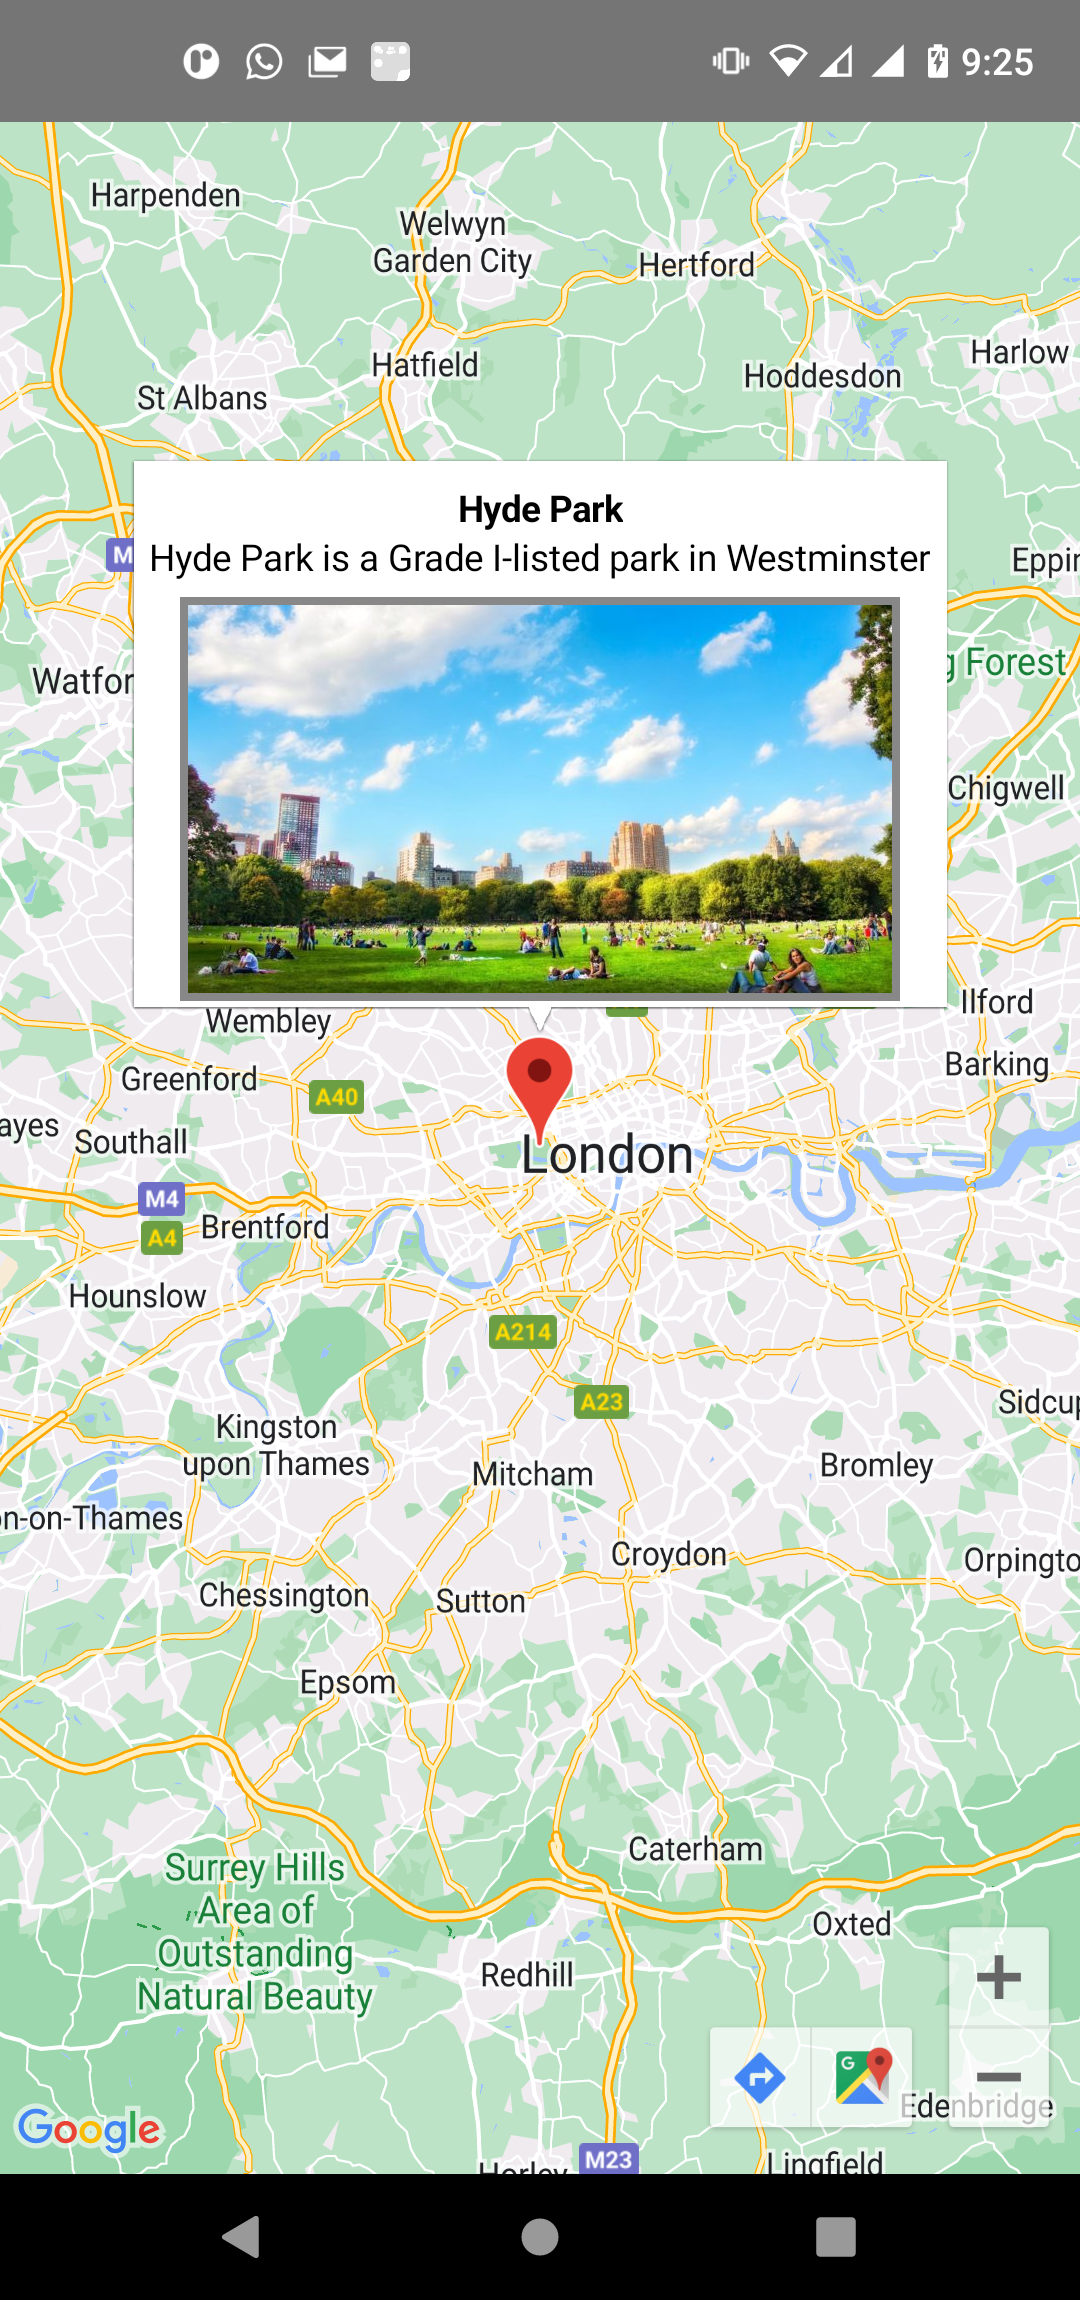
You can customise the window of the marker by using a MarkerInfoWindowContent Composable. This also has a slot based API, meaning you can pass in your own composables to render your custom UI in the window.
 setContent {
    val hydePark = LatLng(51.508610, -0.163611)
    val cameraPositionState = rememberCameraPositionState {
        position = CameraPosition.fromLatLngZoom(hydePark, 10f)
    }

    GoogleMap(
        modifier = Modifier.fillMaxSize(),
        cameraPositionState = cameraPositionState) {
            MarkerInfoWindowContent(
                state = MarkerState(position = hydePark),
                title = "Hyde Park",
                snippet = "Marker in Hyde Park"
            ) { marker ->
                Column(horizontalAlignment = Alignment.CenterHorizontally) {
                    Text(
                        modifier = Modifier.padding(top = 6.dp),
                        text = marker.title ?: "",
                        fontWeight = FontWeight.Bold
                    )
                    Text("Hyde Park is a Grade I-listed parked in Westminster")
                    Image(
                        modifier = Modifier
                            .padding(top = 6.dp)
                            .border(
                                BorderStroke(3.dp, color = Color.Gray),
                                shape = RectangleShape
                            ),
                        painter = painterResource(id = R.drawable.hyde_park),
                        contentDescription = "A picture of hyde park"
                    )
                }
            }
        }
}
Running this shows the custom window above the marker when you tap on it.
Showing multiple markers
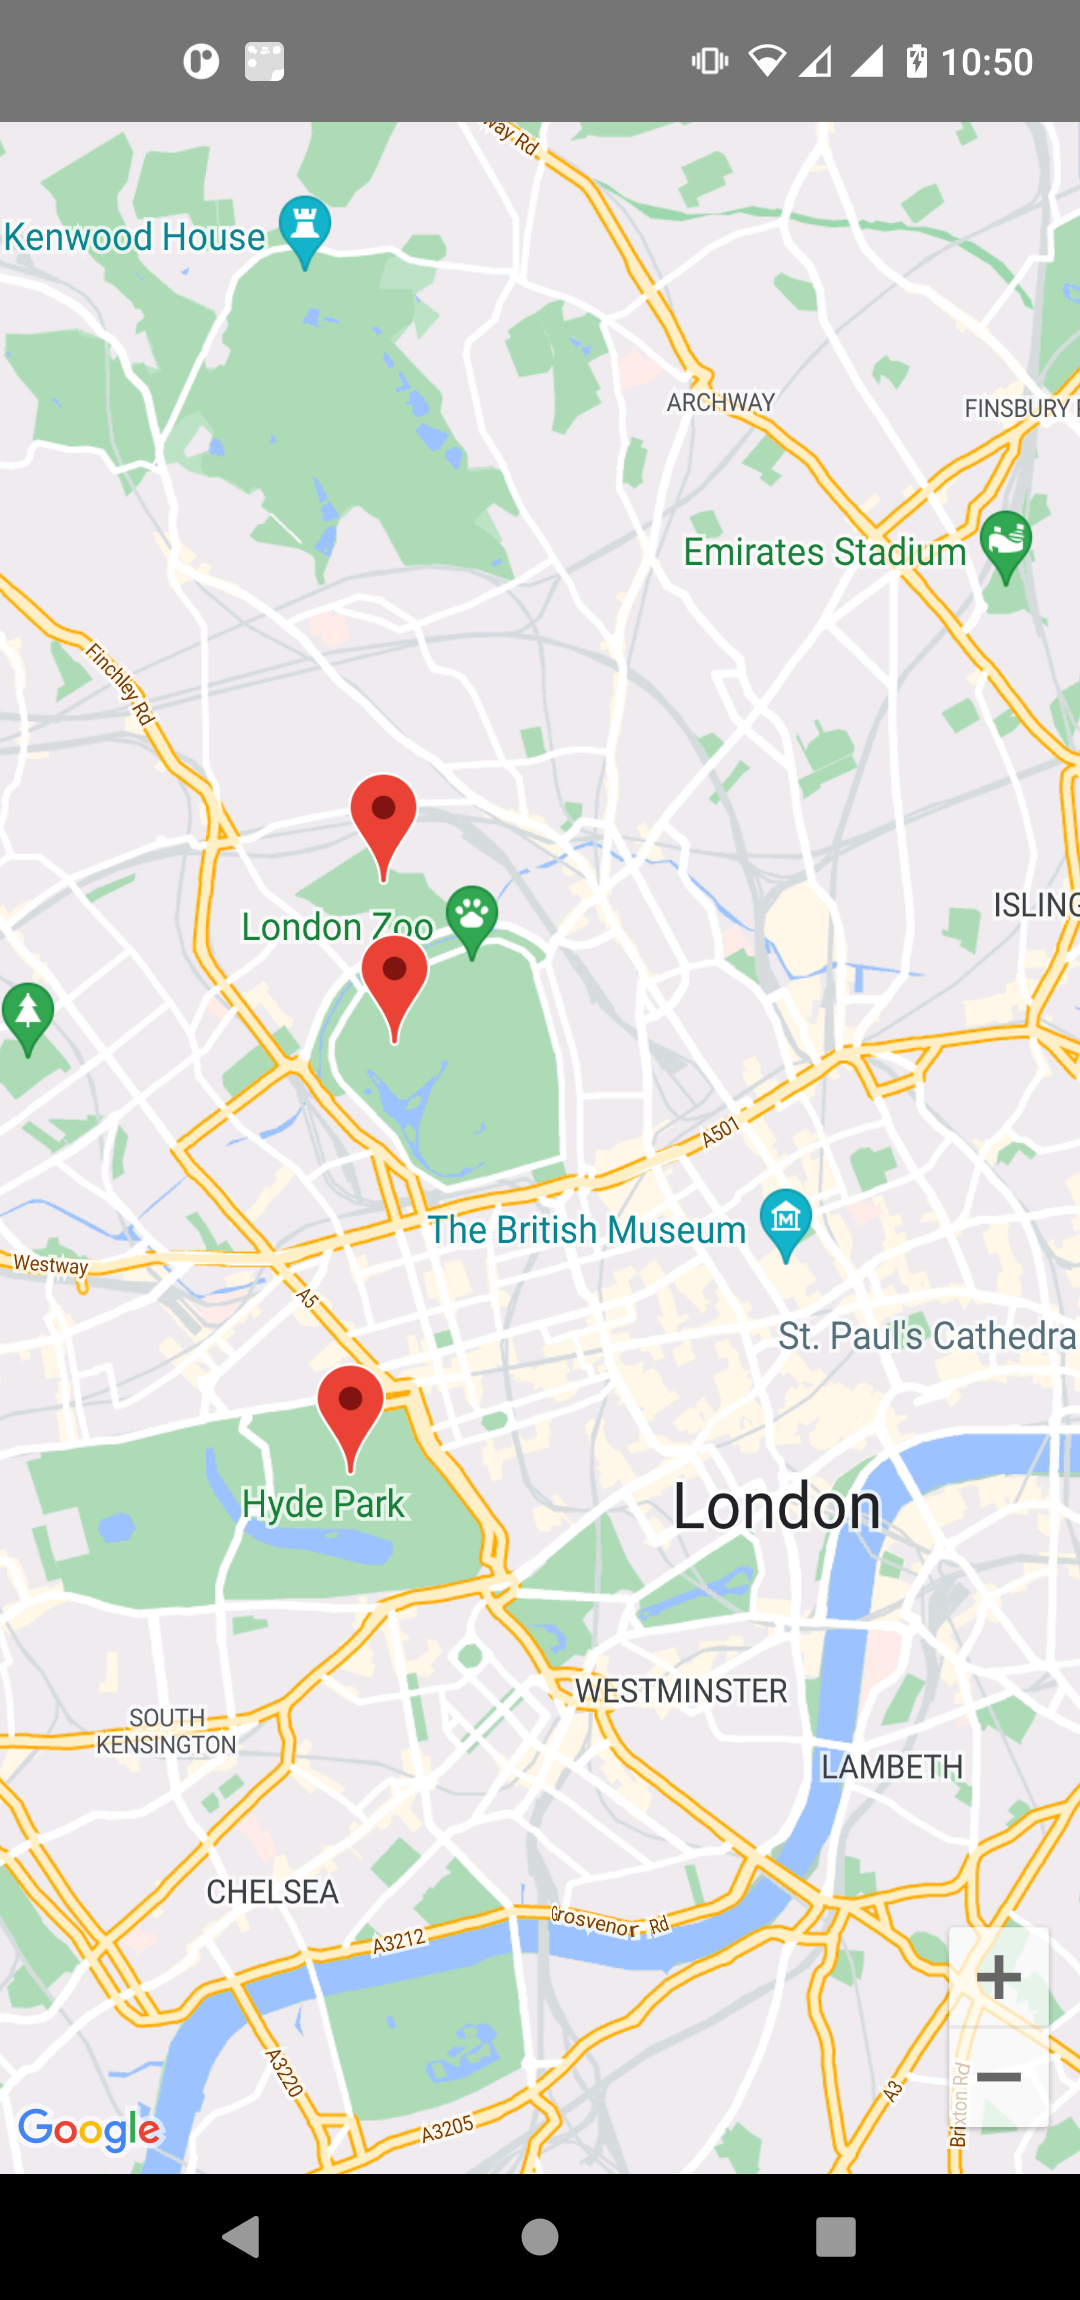
Showing multiple markers is as simple as adding as many as you need. Let’s add markers for a few different parks in West London.
 setContent {
    val hydePark = LatLng(51.508610, -0.163611)
    val regentsPark = LatLng(51.531143, -0.159893)
    val primroseHill = LatLng(51.539556, -0.16076088)
    val cameraPositionState = rememberCameraPositionState {
        position = CameraPosition.fromLatLngZoom(hydePark, 10f)
    }

    GoogleMap(
        modifier = Modifier.fillMaxSize(),
        cameraPositionState = cameraPositionState) {
            // Marker 1
            Marker(
                state = MarkerState(position = hydePark),
                title = "Hyde Park",
                snippet = "Marker in Hyde Park"
            )
            // Marker 2
            Marker(
                state = MarkerState(position = regentsPark),
                title = "Regents Park",
                snippet = "Marker in Regents Park"
            )
            // Marker 3
            Marker(
                state = MarkerState(position = primroseHill),
                title = "Primrose Hill",
                snippet = "Marker in Primrose Hill"
            )
        }
 }
Run the code and you will see your markers appear on the map.
Clustering Markers
A map can get busy within a short amount of time. If you’re trying to show 300 markers, it’s going to be visually hard for a user to understand what is going on. Google Maps and your device won’t thank you ether, since it will have to render every single marker, impacting performance and battery life.
The solution to this is Clustering, a technique grouping markers close to each other into a single marker. This Clustering happens on a zoom level basis. As you zoom the map out the markers will group together into a cluster, as you zoom in the cluster will split into individual markers.
Google Maps for Compose provides this out of the box via a Clustering composable. There’s no need to write complex sorting or filtering for the clustering to occur.
 setContent {
    val hydePark = LatLng(51.508610, -0.163611)
    val regentsPark = LatLng(51.531143, -0.159893)
    val primroseHill = LatLng(51.539556, -0.16076088)

    val crystalPalacePark = LatLng(51.42153, -0.05749)
    val greenwichPark = LatLng(51.476688, 0.000130)
    val lloydPark = LatLng(51.364188, -0.080703)
    val cameraPositionState = rememberCameraPositionState {
        position = CameraPosition.fromLatLngZoom(hydePark, 10f)
    }

    GoogleMap(
        modifier = Modifier.fillMaxSize(),
        cameraPositionState = cameraPositionState) {

            val parkMarkers = remember {
                mutableStateListOf(
                    ParkItem(hydepark, "Hyde Park", "Marker in hyde Park"),
                    ParkItem(regentspark, "Regents Park", "Marker in Regents Park"),
                    ParkItem(primroseHill, "Primrose Hill", "Marker in Primrose Hill"),
                    ParkItem(crystalPalacePark, "Crystal Palace", "Marker in Crystal Palace"),
                    ParkItem(greenwichPark, "Greenwich Park", "Marker in Greenwich Park"),
                    ParkItem(lloydPark, "Lloyd park", "Marker in Lloyd Park"),
                )
            }

            Clustering(items = parkMarkers,
            onClusterClick = {
                // Handle when the cluster is tapped
            }, onClusterItemClick = { marker ->
                // Handle when a marker in the cluster is tapped
            })
        }
}

data class ParkItem(
    val itemPosition: LatLng,
    val itemTitle: String,
    val itemSnippet: String) : ClusterItem {
        override fun getPosition(): LatLng =
            itemPosition

        override fun getTitle(): String =
            itemTitle

        override fun getSnippet(): String =
            itemSnippet
}
Notice the ParkItem data class added. We need this because items passed into a Clustering composable have to conform to the ClusterItem interface. The interface provides the Cluster with the position, title and snippet for each marker.
Zoom in and out, and you’ll see the clustering in action.
Getting Location Permission
Maps and user position often go hand in hand, so it makes sense for some mapping apps to ask permission for the users location.
Treat a users permission with respect if you do this, location permission is one of the most sensitive permissions to acquire from a user. Make sure you inform the user of why you need this permission and actively show the benefits of granting it. Bonus points if your app partially functions without the need for permission at all.
Google provide some great guides on how to handle users location, as well as a separate guide for accessing location data in the background.
So you’ve done your due diligence and decided you do need the users permission to access location. With the permissions library in Accompanist you do it like so:
// Don't forget to add the permissions to AndroidManifest.xml
val allLocationPermissionState = rememberMultiplePermissionsState(
    listOf(android.Manifest.permission.ACCESS_COARSE_LOCATION,
           android.Manifest.permission.ACCESS_FINE_LOCATION)
)

// Check if we have location permissions
if (!allLocationPermissionsState.allPermissionsGranted) {
    // Show a component to request permission from the user
    Column(
        horizontalAlignment = Alignment.CenterHorizontally,
        verticalArrangement = Arrangement.Center,
        modifier = Modifier
        .padding(horizontal = 36.dp)
        .clip(RoundedCornerShape(16.dp))
        .background(Color.white)
    ) {
        Text(
            modifier = Modifier.padding(top = 6.dp),
            textAlign = TextAlign.Center,
            text = "This app functions 150% times better with percise location enabled"
        )
        Button(modifier = Modifier.padding(top = 12.dp), onClick = {
            allLocationPermissionsState.launchMultiplePermissionsRequest()
        }) {
            Text(text = "Grant Permission")
        }
    }
}
Via accompanist we’re checking to see if the app has access to the ACCESS_FINE_LOCATION permission, or a high level of GPS accuracy in english. It’s important to include the requested permissions in the Android manifest, as you won’t be able to request the permissions otherwise. The Android system and Google Play store also use the manifest to understand how your app works and inform users.
If permission isn’t granted, a small dialog composable is shown explaining the need for the permission and a button to launch the permission request via the system.
Animating the Map
Whilst most map apps require a user to move the map via touch, Google Maps for Compose provides APIs to move the map programmatically. This can be useful if you want to navigate to an specific area in response to an event.
In this example, we’ll gently navigate the app through our collection of markers.
Box(contentAlignment = Alignment.Center) {
    GoogleMap(
        modifier = Modifier.fillMaxSize(),
        cameraPositionState = cameraPositionState
    ) {
        Clustering(items = parkMarkers,
            onClusterClick = {
                // Handle when the click is tapped
                false
            }, onClusterItemClick = { marker ->
                // Handle when the marker is tapped
            })

        LaunchedEffect(key1 = "Animation") {
            for (marker in parkMarkers) {
                cameraPositionState.animate(
                    CameraUpdateFactory.newLatLngZoom(
                        marker.itemPosition, // LatLng
                        16.0f), // Zoom level
                      2000 // Animation duration in millis
                    ),
                    delay(4000L) // Delay in millis
            }
        }
    }
}
The key part here is the code inside the LaunchedEffect. For each marker the app sets up a cameraPositionState.animate() call to navigate to the marker. The camera receives this information via an update to the camera, created using CameraUpdateFactory.newLatLngZoom().
This method takes a LatLng, a float indicating the zoom level of the map and a long to set the duration of the animation.
Finally, to space the animations we use delay() to add a 4 second pause between each animation.
Showing Street View
It’s not just an aerial map Google Maps for Compose helps you with. You can also give apps access to Street View, showing a 360 view of a location. You do this by using the StreetView composable:
var selectedMarker: ParkItem? by remember { mutableStateOf(null) }

if (selectedMarker != null) {
    StreetView(Modifier.fillMaxSize(), streetViewPanoramaOptionsFactory = {
        StreetViewPanoramaOptions().position(selectedMarker!!.position)
    })
} else {
    Box(contentAlignment = Alignment.Center) {
        GoogleMap(
            modifier = Modifier.fillMaxSize(),
            cameraPositionState = cameraPositionState
        ) {
            Clustering(items = parkMarkers,
            onClusterClick = {
                // Handle when the cluster is clicked
                false
            }, onClusterItemClick = { marker ->
                // Handle when a marker in the cluster is clicked
                selectedMarker = marker
                false
            })
        }
    }
}
In this example, we’re setting the selectedMarker variable whenever a marker is tapped. If a marker is selected we show Street View, passing in the position of the marker.
Drawing Shapes
You may want to draw your own shapes and annotations onto the map. Google Maps for Compose provides a number of composables to do this, in this post we’re going to use the Circle composable.
A circle is a good shape to use if your app uses Geofences to react to changes from a users location. A circle can represent the area a geofence is active within.
    Box(contentAlignment = Alignment.Center) {
        GoogleMap(
            modifier = Modifier.fillMaxSize(),
            cameraPositionState = cameraPositionState
        ) {
            Clustering(items = parkMarkers,
            onClusterClick = {
                // Handle when the cluster is clicked
                false
            }, onClusterItemClick = { marker ->
                // Handle when a marker in the cluster is clicked
                selectedMarker = marker
                false
            })
        }
    }

    parkMarkers.forEach {
        Circle(
            center = it.position,
            radius = 120.0,
            fillColor = Color.Green,
            strokeColor = Color.Green
        )
    }
Here, we setup a circle for each of our markers. Creating a circle involves passing it a position and the size of the radius for the circle. We also use two optional parameters to set the color of the border and fill color for the circle.
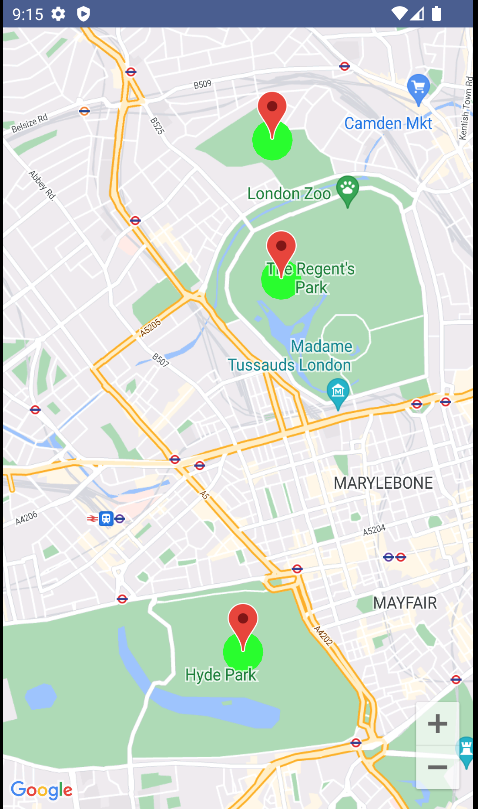
Showing a ScaleBar
A good map often comes with legends and diagrams showing what a measure of space on the map is equivalent to in distance. This gives you an idea of the spaces involved in the map, as not every map may use the same form of measurements.
For digital maps that can zoom in and out, this adds a particular layer of complexity as the distances represented can change dynamically. Fortunately, Google Maps for Compose has you covered.
Using the Widgets library, you gain access to the DisappearingScaleBar and ScaleBar composables. These are UI components that sit at the top of the map, providing users with a measure of distance that changes depending on the zoom level.
    Box(contentAlignment = Alignment.Center) {
        GoogleMap(
            modifier = Modifier.fillMaxSize(),
            cameraPositionState = cameraPositionState
        ) {
            // You can also use ScaleBar
            DisappearingScaleBar(
                modifier = Modifier
                .padding(top = 5.dp, end = 15.dp)
                .align(Alignment.TopStart),
                cameraPositionState = cameraPositionState
            )

            Clustering(items = parkMarkers,
            onClusterClick = {
                // Handle when the cluster is clicked
                false
            }, onClusterItemClick = { marker ->
                // Handle when a marker in the cluster is clicked
                selectedMarker = marker
                false
            })
        }
    }

    parkMarkers.forEach {
        Circle(
            center = it.position,
            radius = 120.0,
            fillColor = Color.Green,
            strokeColor = Color.Green
        )
    }
After adding the composable, you get a ScaleBar that changes depending on the zoom level at the top of the map.
Help and Support
Google Maps for Compose is a great way to work with Google Maps and there’s plenty more to learn. Here are a few places I recommend if you need help:
-
Google Maps for Compose Repo: The repo containing the source code for the library. Contains code samples on how to use the library and also where you can submit your bug reports and contributions
-
Google Maps for Android Website: The place to go to learn the concepts behind Google Maps for Android. These are high level and don’t use the Compose library, but are nevertheless important to know as these are used in the background.
-
Google Maps Platform Discord The official Discord server for Google Maps. Here you can find people discussing Google Maps for multiple platforms, asking and offering help, and showcasing their own work.